One of the standout features of UpdateBIM is the ability to store Revit groups directly on the platform, following specific rules:
- A group can consist of both system families and loadable families.
- The families used can be from UpdateBIM or other sources.
To create and store a group in UpdateBIM, follow these steps:
Step 1: Create the Group Elements
For example, if we want to create a standard bathroom using objects from Autodesk’s public library, we might include the following set of entities:
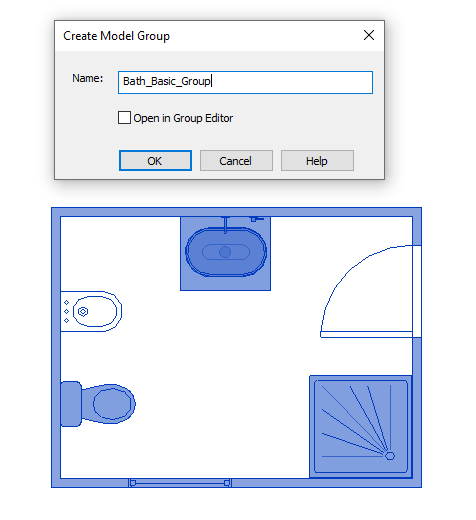
The name assigned to the group must be unique within the catalog.
Once the group is created, use the Content Manager to register it in the catalog. Ensure you have administrator privileges and select the desired folder for storage.
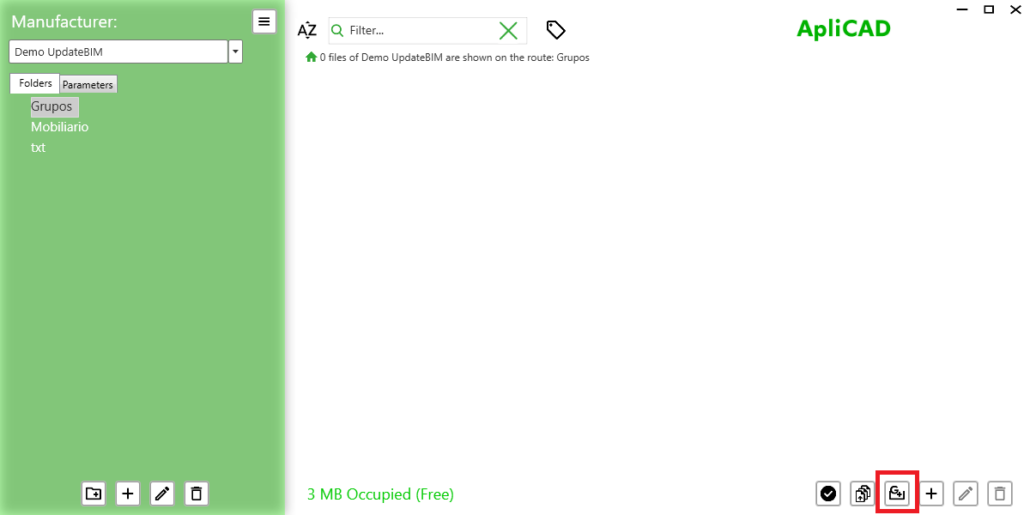
Use the group management button shown in the image.
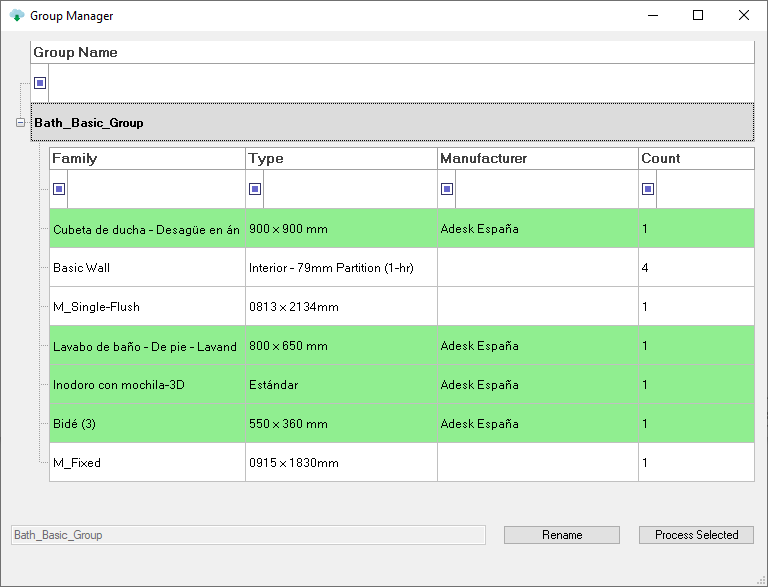
The Group Manager will display the existing groups in the project. If you select the group you just created, detailed information about the families it contains will be displayed. Families shown in green belong to a catalog we have access to, while those in white are not associated with any catalog.
If all information is correct, click the “Process Selected” button to store the group in the database.
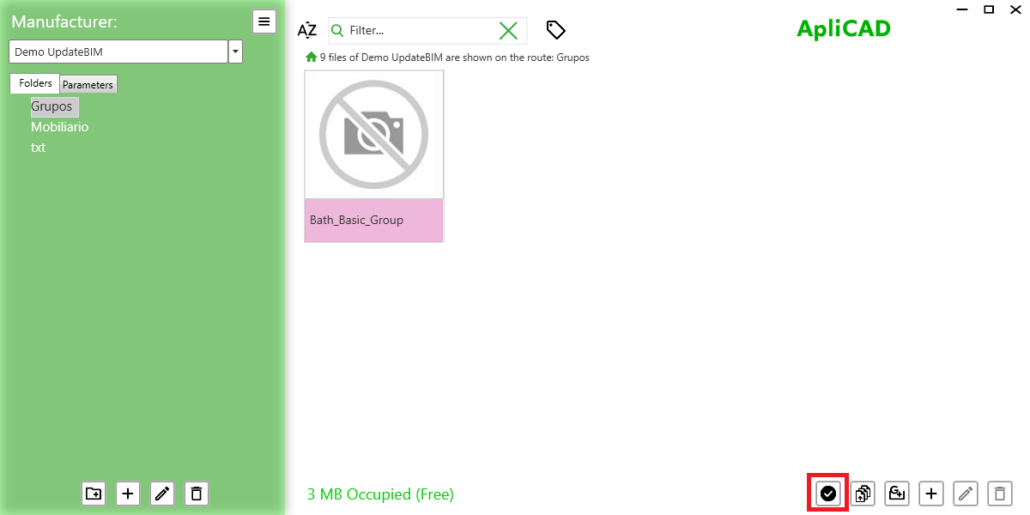
The group will appear with a purple band, indicating that it has been created but not yet published. To publish it, use the publish button shown in the image. The program will request confirmation before proceeding with the publication.
Step 2: Save the Group File
Go to Revit, and in the Project Browser, find the Groups section. Locate the group you just created and use the right-click context menu to select the “Save Group” option to store it on your hard drive for later use.
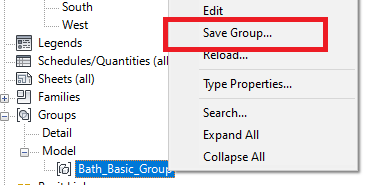
Use the “Save Group” option and, without changing the name, save it to a specific folder on your hard drive where it will be used in the next step.
Step 3: Upload the Group to UpdateBIM
Close the current Revit project without saving changes and open a new blank project.
Return to the Content Manager and select the folder where you saved the new group. A message will appear indicating that this is the first time this group is being used.
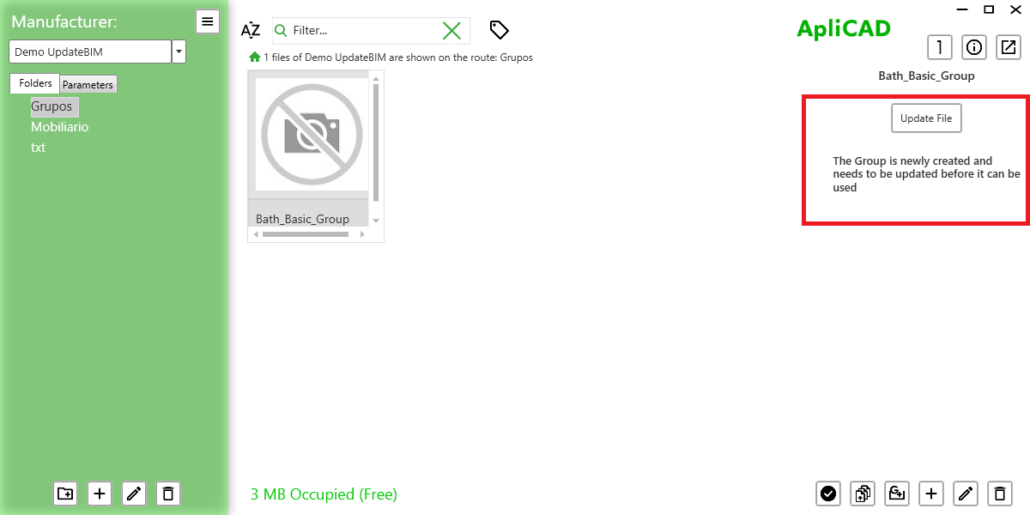
Click “Update File,” and the program will show the folders on your computer. Locate the file you saved in the previous step.
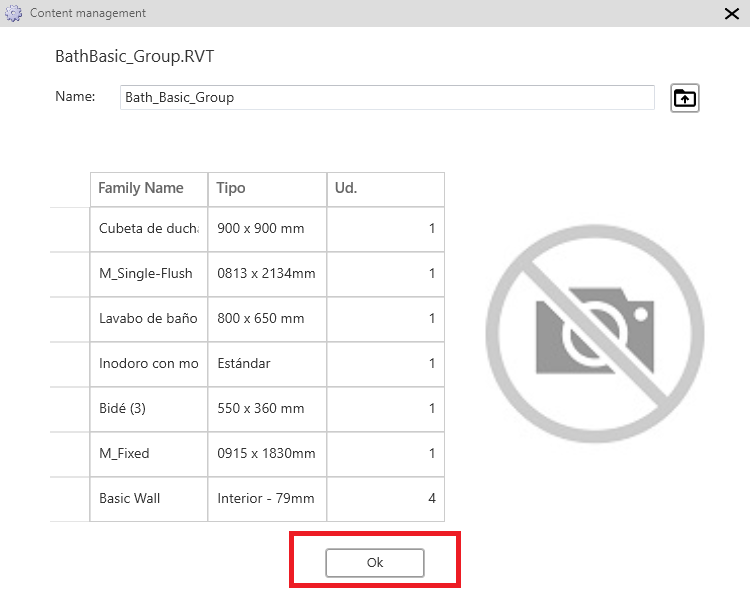
If you are satisfied with the list of elements that make up the group, click the confirmation button to update the group and make it available to catalog users. It is important to remember that every time a family is edited, it must be published at the end.


