Tags are a fundamental tool that UpdateBIM provides to efficiently organize and search families.
The catalog administrator, through the UpdateBIM web interface, can create as many tags as needed, which will then be used to classify each family.
It is important to note that tags are assigned at the Family level, not at the Type level. This means that in cases where families contain very diverse types, tag assignment might require a more specific prior definition.
To manage tags, you must access the web interface and follow the appropriate steps.
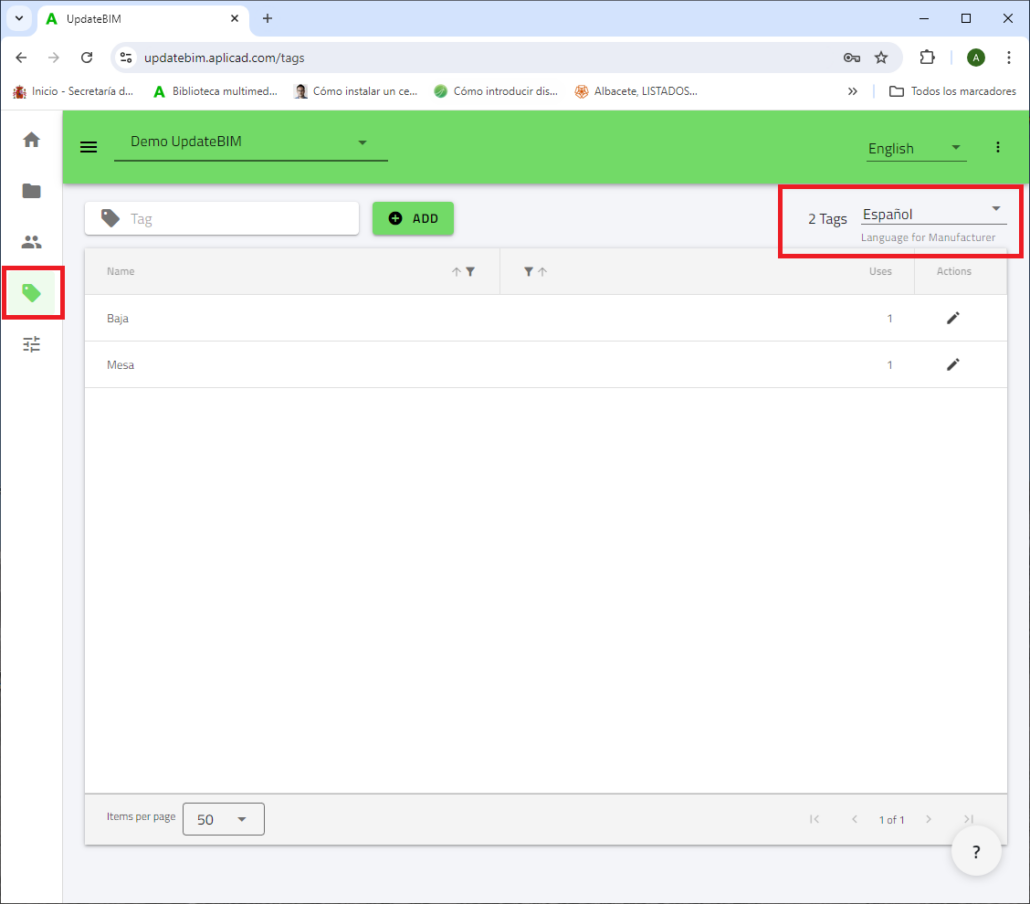
In a multilingual catalog, tags are displayed in the selected language, as shown in the previous image, where it appears in Spanish. It is important not to confuse this with the program’s interface language, which in this case is set to “English,” as indicated in the language selector located at the top right of the page.
For example, if you want to edit the tag “Baja,” you should use the pencil icon button located on the right. Clicking this button will open a pop-up dialog.
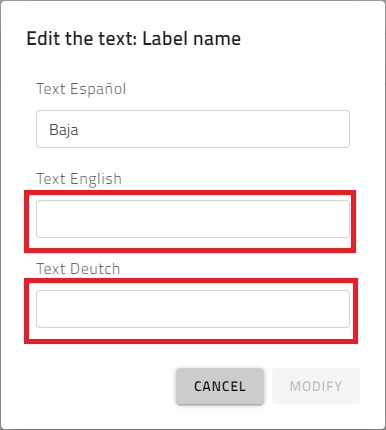
In this dialog, you can enter the values for “Baja” in English and German.
The changes made by the catalog administrator in the web interface will be reflected in the Revit plugin as follows:
Suppose a user in Germany wants to use the manufacturer’s catalog, which has information available in several languages.
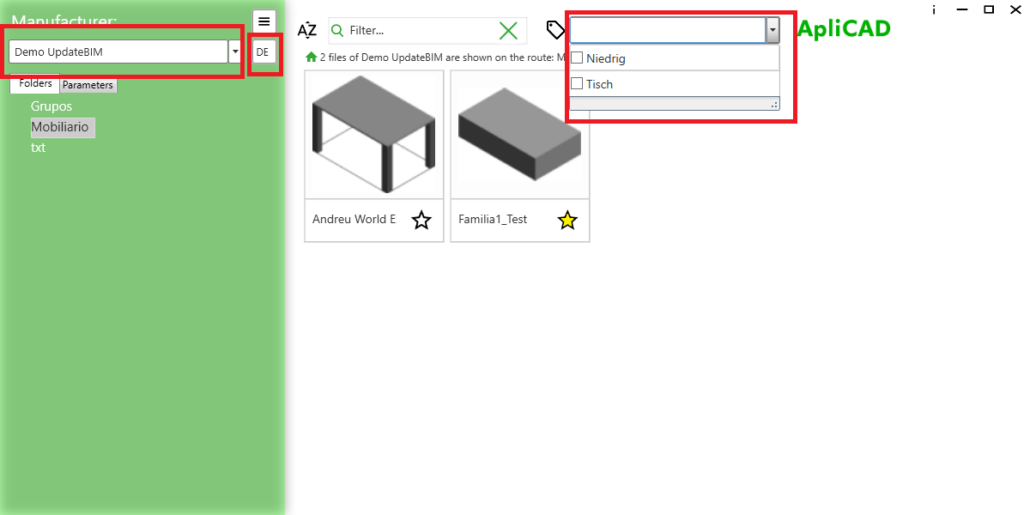
If the user has configured the catalog in German (DE), as shown, the available tags will appear in that language.
Assigning Tags to Families
To assign the created tags to families, you need to access the UpdateBIM web interface as a catalog administrator. From there, in the list of objects, select the one you want to modify. For example:
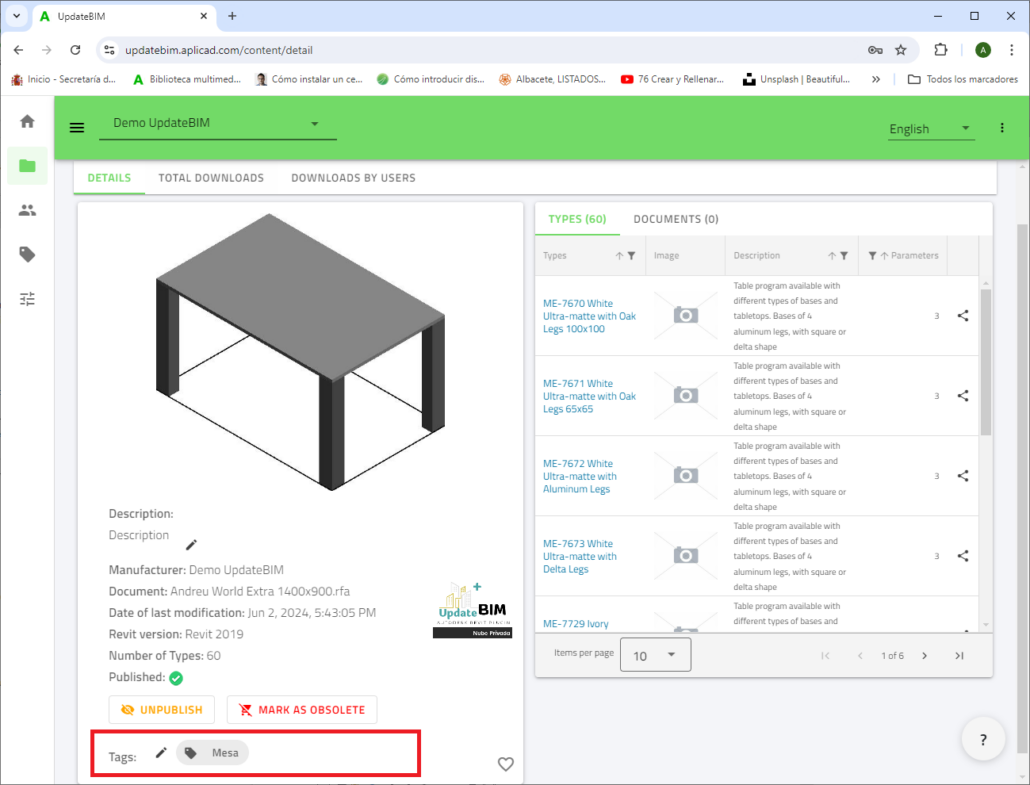
In the bottom left of the object’s property list, you will find the tag selector. This allows you to assign multiple tags to a family or remove any previously assigned tags.
It is important to note that all changes made by the administrator are applied immediately for all catalog users, without the need to notify them about the modifications introduced.


